Cisco Secure Client (macOS) - Intune
Purpose
This guide explains how to deploy Cisco Secure Client (AnyConnect) to macOS devices using Microsoft Intune, including the required configuration profiles for system extensions, managed login items, and kernel/network extensions.
Cisco Secure Client requires additional configuration compared to standard macOS PKG or DMG apps due to:
- System extension approval
- Code‑signing requirements
- Background services (login items)
Without these configurations, the client may install but not function correctly.
Scope
Applies to
- macOS devices managed by Microsoft Intune
- Cisco Secure Client (AnyConnect) 5.x
Out of scope
- VPN profile configuration
- Certificates / authentication
- Post‑connect compliance or posture
Prerequisites
You need:
- A file extraction tool
- Windows: 7‑Zip
- macOS: Built‑in Archive Utility or unzip (Cisco WebDeploy PKG is a ZIP file)
- Access to Microsoft Intune
- Permission to create macOS apps and configuration profiles
- Access to Cisco downloads
Cisco Secure Client 5 for macOS
Step 1 – Download Cisco Secure Client
Sign in to https://cisco.com.
Navigate to:
Support → Products and Downloads → Secure Client → Secure Client 5
Select macOS
Download:
cisco-secure-client-macos-{latest version}-webdeploy-k9.pkg
Accept the terms and save the file.
Step 2 – Extract the Core VPN Installer
Cisco’s WebDeploy package contains multiple components.
Only the Core VPN PKG is required.
Windows (7‑Zip)
- Right‑click the downloaded PKG → Extract
- Navigate to:
- Open:
Cisco Secure Client macOS <version> Core VPN WebDeploy.dmg
- Open:
Cisco Secure Client AnyConnect VPN <version>
- Locate the PKG file
- Move it to a known location (for example Documents)
This PKG will be uploaded to Intune later.
macOS (Optional – if extracting on a Mac)
Note: Cisco “WebDeploy” .pkg files are ZIP archives on macOS and cannot be opened with pkgutil.
Option A – Finder (GUI)
- Right‑click the downloaded PKG
- Select Open With → Archive Utility
- A folder will be created next to the file
Option B – Terminal (recommended)
Shell
unzip Cisco_Secure_Client_macOS_<version>_WebDeploy
Show more lines
Then:
- Navigate to:
/binaries/
- Open:
Cisco Secure Client macOS <version> Core VPN WebDeploy.dmg
- Open:
Cisco Secure Client AnyConnect VPN <version>
- Locate the PKG file
- Move it to a known location (for example Documents)
This PKG will be uploaded to Intune later.
Step 3 – Configuration Profile: System Extensions
Intune path
Devices → macOS → Configuration → Create profile
Profile type: Settings catalog
Profile name
Cisco VPN – System Extensions
Settings
Allowed system extension types
- Type: Network Extensions
- Team Identifier: D8Y96K9QP
Allowed system extensions
- Bundle Identifier: com.cisco.anyconnect.macos.acsockext
- Team Identifier: DE8Y96K9QP
Assignments
Assign to a macOS pilot group.
Step 4 – Configuration Profile: Managed Login Items
Intune path
Devices → macOS → Configuration → Create profile
Profile type: Settings catalog
Profile name
Cisco VPN – Managed Login Items
Settings path
Service Management → Login Items → Managed Login Items
Rule
- Comment: Cisco Secure Client
- Rule type: Team Identifier
- Rule value: DE8Y96K9QP
Assign to the same pilot group.
Step 5 – Configuration Profile: Kernel & System Extensions (Custom XML)
- Open the Cisco Secure Client Administrator Guide
- Copy the macOS system & kernel extension approval XML
- Paste it into a text editor
- Save as:
secure-client.mobileconfig
Upload to Intune
Devices → macOS → Configuration → Create profile
Profile type: Templates → Custom
Upload secure-client.mobileconfig and assign to the pilot group.
Step 6 – Deploy the Application
Intune path
Apps → macOS → Add → macOS PKG
App info
- Name: Cisco Secure Client 5.x
- Publisher: Cisco
- Minimum OS: macOS Sonoma
Assignment
- Required
- Pilot group
Step 7 – Sync and Validate
- Open Company Portal on the Mac
- Trigger a sync
Confirm:
- All three configuration profiles apply
- Cisco Secure Client installs
Validation
- System Settings shows Cisco extensions approved
- Login items are managed
- Cisco Secure Client connects successfully
Result
Cisco Secure Client is now:
- Installed via Intune
- System extensions pre‑approved
- Login items managed
- Fully MDM‑owned
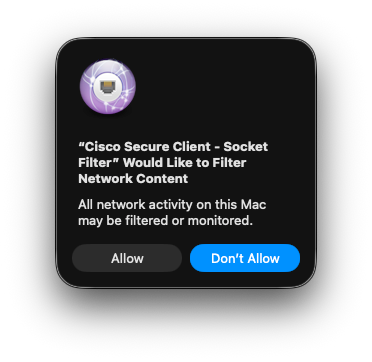
potential visual indicators for the end user :